Learn Your New Students' Faces, Names, and More with Google Slides

One of the first things every teacher wants to do each year is memorize their students faces and names. This makes a personal connection to each of your students and helps them feel welcome and valued in your class. The last thing we want to do is call a student by the wrong name or have to resort to a "Hey you".
When I was first teaching (back in 1992, you do the math) I took pictures of my new students on the first day of class with an old camera with 110 film. I then would get the pictures developed at my local drug store and would attach the photos to 4x6 cards I had the students fill out with their names and details about themselves.
These became my flashcards so I could learn my students names, faces, and key detailsabout each of them. I would practice with these for the first week or so of school to make sure I learned all 130 or so new students I had that year.
Well now with technology there are so many better and faster ways to do this. For one example I have created a Google Slideshow template that you can use to help learn your students names and faces and a little about them. You can even randomize the slides for better quizzing of yourself. See below to get your copy of the template and directions for how to use it.
Step 1 - Get the Template
Below is a link to the Google Slides template for "Student Photos, Names, and More". When you click on the link it will make a copy of the template so you will have your own that you can use and edit as needed.
- "Student Photos, Names, and More" - Google Slides template link
You will want to edit the first slide of the template to include your name and the name of the class. You can also delete the instructions slide if you want.
Tools and ideas to transform education. Sign up below.
Since students will be editing the slideshow as a class, make as many copies as you needso each class period will have their own slideshow.
Step 2 - Share the Slideshow with your Students
Next you will want to share the slideshow with your students and give them edit rights. Your students need to be able to add a photo and enter text in the slideshow, so they will need edit access, at least at first.If you use Google Classroom you can push out the slideshow as an assignment:
- Create an assignment in Classroom and add a title and instructions.
- Click the "Drive" icon to attach the Google Slideshow for this class.
- For the permissions choose "Students can edit file". This will allow all of the the students in the class to edit this specific slideshow.
- If you are not grading this activity, be sure to switch the "Points" to "Ungraded".
- Click "Assign" to push it out to the students.
Alternately you can simply share the slideshow directly with your students using the normal "Share" button in Google Slides. Again, just make sure to share it with edit rights.
Step 3 - Students Edit their Slides
Now each student will open the slideshow, choose a slide to work on, and enter their information.
- Next to "Name" they can enter their name.
- Next to "About me" they can write about themselves. Let the students know if there are specific details you would like here such as interests, family, sports, pets, TV and movies, music, favorite subjects, etc.
- Finally the students will add a photo of themselves to their slide.
If the students are using Chromebooks or a computer with a webcam, my recommendation for adding a photo is as follows:
- Have the student click on the photo placeholder box on the right side of the slide.
- Next click "Replace image" in the toolbar above.
- Then choose "Camera" from the drop-down menu.
- Next have them use their webcam to take a picture of themselves.
- Finally click "Replace" to insert the photo.
This method will replace the placeholder image with their photo (and will keep the animation order intact, which we will explain next).
Note: If the students do not have a webcam they can always upload an image as well. However, still have them follow the directions about to "Replace image" but choose "Upload" instead of "Camera".
Step 4 - Practice Learning Students
Now that you have the slideshow completed by your students, you can practice learning their faces, names, and more details.
- First, begin by running the presentation as normal by clicking the "Present" button in the top right corner.
- Now start clicking to advance the slides.
- Each student slide has animations set for both the photo and text areas.
- On the first click, the student's photo will appear. You can now test yourself to recall the student's name.
- On the second click, the student's name and details will appear. You can now check yourself, and as needed you can remind yourself of the student's name and details.
- Keep practicing until your have learned your students.

Step 5 - Randomize the Slideshow
For a bonus you can also randomize the slides in your slideshow to help practice your students in a random order. One way to do this is the use the "Slides Toolbox" add-on to randomly shuffle the slides.
- Install "Slides Toolbox" by clicking "Add-ons" then "Get Add-ons" then searching for "Slides Toolbox".
- Alternately you can go directly to this link: Slides Toolbox add-on link
- Click the "+ Free" button to install the add-on.
With the add-on installed:
- Click "Add-ons" the "Slides Toolbox" then "Open".
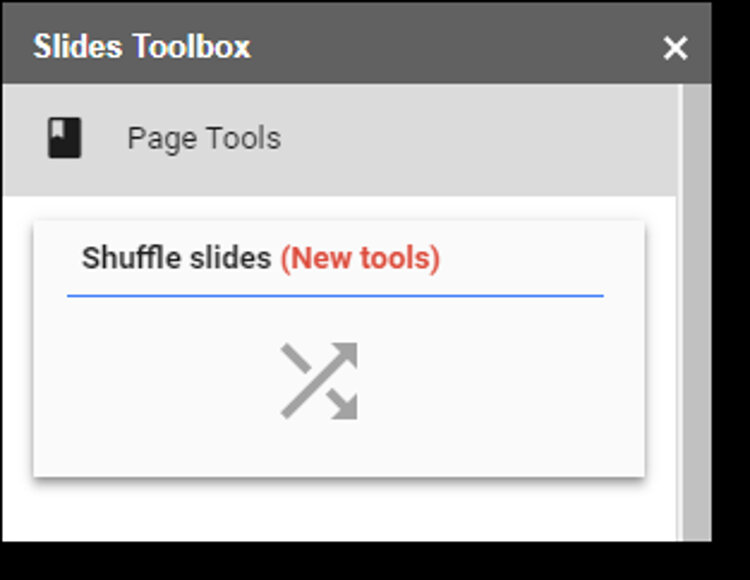
- When the add-on panel opens on the right, choose the "Page Tools" section.
- Next click "Shuffle slides".
- Click "Yes" to randomly shuffle all the slides.
Now you can present the slides as normal to practice, and the slides will all be rearranged in a new order.

Conclusion
This slideshow template is just one idea for how you could learn your students' names and faces. There are certainly many other ways to accomplish this. Feel free to share activities and tools you have used to help with this in the comments below.
cross posted at www.controlaltachieve.com
Eric Curts is an education trainer and consultant with over 20 years' experience throughout the U.S. He is an authorized Google Education Trainer and a Google Certified Innovator. Read his blog at www.controlaltachieve.com and follow him on Google+ and @ericcurts on Twitter.
