How To: Make an SSTV Puzzle

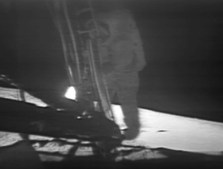
SSTV, or Slow-Scan Television, is a picture transmission method, used mainly by amateur radio operators, to transmit and receive static pictures via radio in monochrome or color. Most famously, SSTV was used to send back some of the first pictures of Space and the Moon. The most famous picture being this one from the Apollo 11 mission which shows Neil Armstrong descending a ladder to become the first human to step onto the surface of the Moon.
I used SSTV to make the final puzzle to end the first act of my classroom Alternate Reality Game called TwentyTwenty. After solving a coded riddle, and entering the answer into one of my character’s websites, students were given another coded message and this sound file. The coded message told them the weird sound they were hearing is something called SSTV in the Scottie 1 frequency. It took them about two weeks, but they eventually figured out what SSTV was and how to solve the puzzle. They turned the sound file into a picture, sent the picture to the main character, and brought Act I to a close!
Much like me, they were blown away the first time they saw sound turn into a picture. The Schoology discussion thread blew up as each kid posted their own video and explained how they figured out how to solve the SSTV puzzle, as it has come to be known.
I love this puzzle so much, I wanted to show you how to make one for your class.
Let’s start with the finished product. In this short video, you will see the SSTV decoder “listening” through my computer’s microphone for an SSTV signal. Once I start the SSTV signal (that weird sound you hear), you will see the SSTV decoder begin to turn the sound into a picture. The picture in this video was the picture my students had to send to one of the characters to fully solve the puzzle.
http://www.techedupteacher.com/wp-content/uploads/2014/01/SSTV-Puzzle.mp4
01:22
Tools and ideas to transform education. Sign up below.
01:54
02:06
You will need four things things to create a working SSTV puzzle. A SSTV Signal Generator, SSTV Decoder*, a microphone, and speakers.
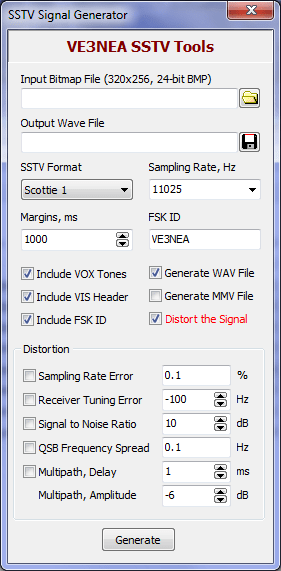
First thing you’ll want to do is install the Generator and the Decoder somewhere on the computer you will be able to find them. Next, open the file called Sstvgen.exe. The default install path is C:\Program Files (x86)\Afreet\SstvTools\sstvgen.exe. The program looks like this when you open it.

We don’t need to do anything in the way of clicking here, there is nothing you need to change in this program, but what we do need to do is create a .bmp (bitmap) picture that we want to turn into a sound.
Luckily, this can easily be done in MS Paint. Create/paste your picture in MS Paint, size the image pixels to 320×256 and make sure you save it as a .bmp.
Here is the .bmp I used for this puzzle, if you’d like to practice with it first.
Once you have your 320×256 .bmp picture, click on the folder in the SSTV Gen program and find the picture you just created and open it.
Next, click on the floppy disk and decide where you want to save your SSTV signal and what you want to call it. I named mine Scottie 1 since that is the SSTV format we are using and helped clue my kids in on what to do (many Googled Scottie 1).
You don’t need to touch or do anything else. Once you have the picture loaded in and the sound file named, hit the generate button. This will create a .wav sound file at the location you chose.
Congratulations, you’ve created an SSTV signal! Your picture is now sound!
Now to make sure it works and show you how to decode it:
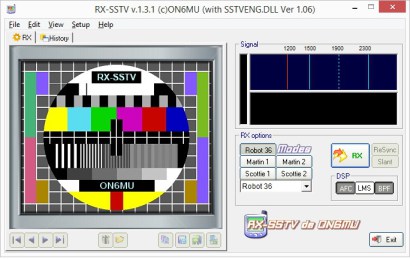
Open the SSTV Decoder. It looks like this:

First thing you want to do is click on the Scottie 1 button since our signal is a Scottie 1 signal. It won’t work if you don’t select Scottie 1.
Next, make sure you have your microphone turned on and your speakers are turned up. Clicking the big RX button will force the program to start and stop listening for your signal. Most of the time though, when you play the .wav file you created, the SSTV Decoder will automatically pick it up (through the microphone) and begin to turn the sound into a picture right before your very eyes!
Play the SSTV singal. Once you play the SSTV singal, the SSTV Decoder should turn the sound file you are playing into the picture you encoded earlier! How cool is that?!
While you are playing the sound file, if the picture becomes distorted, you can stop the sound file and restart it or hit the ReSync button on the decoder, both of these should make for a clear(er) picture.
Whether you are making a classroom ARG or you just want to show your classes something cool, I have no doubt they’ll enjoy a SSTV puzzle as much as my students did.
Until next time,
GLHF
*There are more SSTV Decoders than the one I’ve linked to in this article (Generators, too), but I feel these are the best. Feel free to try other decoders/encoders if you’d like. Most of them are Freeware.
cross-posted at Teched Up Teacher
Chris Aviles teaches English at Barnegat High School in New Jersey. He presents on education topics including gamification, technology integration, BYOD, blended learning, and the flipped classroom. Read more at Teched Up Teacher.
Chris Aviles is a STEM teacher, edtech specialist, and president of Garden State Esports. He is also a regular contributor to Tech & Learning.
