Creating Video in Classrooms

Video is shaping the world around us. Students watch videos all the time, and media literacy is a 21st century skill that involves being able to analyze and understand the media they see and to create their own media productions.

Today’s young people enjoy all types of media and are facile with it. When schools capitalize on this affinity by integrating technologies into classroom activities, students are more engaged. When students are engaged, they are learning.
Using video forces students to make connections, delve to find deeper meaning, and understand issues and processes. They learn to analyze, synthesize, and evaluate as they create. It involves higher order thinking skills, writing, teamwork, planning, producing and sharing using additional technologies.
Video is so versatile that students can learn in every subject area. From creating school-wide daily news broadcasts to classroom documentaries to language practice and filming events, there’s a use for video everywhere. Here’s how to make it happen.

The Process: Prepare, Plan, Present
¦ Prepare. Use the 10 reasons below to convince stakeholders that video is THE technology to use.
¦ Plan and create. Use the 9 steps below in any subject area or grade level.
¦ Present and share. Show everyone what students have accomplished.
10 Reasons to Have Students Create Videos:
Video Production:
1. is fun – and learning should be fun!
2. engages and excites students.
3. helps students to express a real understanding of core classroom content.
4. helps students retain what they learn.
5. allows students to express their creativity.
6. requires students to practice “real-life” skills of planning and organization, time management, cooperation, communication, problem solving, information synthesizing, leadership and followership.
7. utilizes whole curriculum skills: reading, researching, writing, speaking, listening and math skills.
8. requires students to think at a higher level.
9. leads students to improve their technology skills.
10. helps them to develop problem-solving skills.
Tools and ideas to transform education. Sign up below.
9 Steps to Creating a Video
1. Brainstorm a topic or idea
2. Create a plan and rubric:What will happen? Know what you want for the end project. Who will do what? Know who is accountable for each task. Students take on tasks (producer, writer, director, editor, etc.) and share responsibilities.
3. Scripting: Students write, rewrite, and continue the writing process through multiple drafts. The script must have an introduction, body, conclusion and transitions.
4. Storyboarding/Scripting: Sketch out scenes that the video project will have.
5. Sets/Props and Costumes: Plan the place/ backgrounds the video will use. Make sure there is enough light and free of background noise. Creating Costumes – THINK SIMPLE
6. Rehearse: Students must learn their lines. Create cue cards if needed.
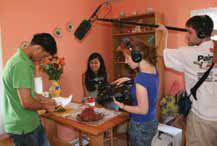
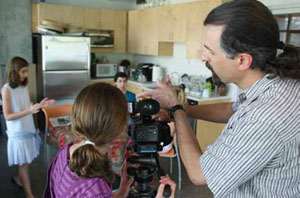
7. Shoot the video
8. Editing and Post Production: Use editing software to put the scenes together, add music, edit sound, add special effects and credits.
9. Share: Upload to a class or school website; Create a DVD; Show at an assembly
Learn More
Download the eBook, Classroom Video: Tools and Strategies to Engage Students in Learning http://newbay.ebookhost.net/tl/sony/1/
