5 Tips to Design Better Forms
Google Forms is a marvelous tool in the classroom. Get even more value out of form by applying these five tips that go beyond the basics.

1. Use validation to collect better data
Your Google Form is only as good as the data it collects. If your data is a mess, it won’t be very useful.
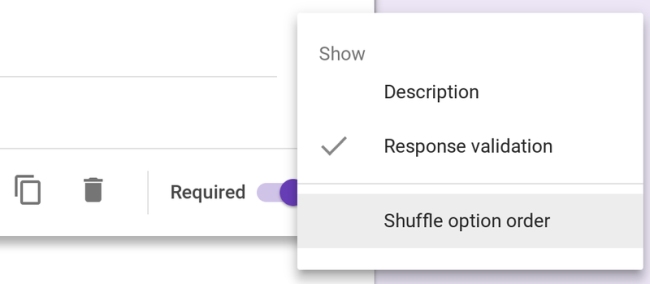
Many of the question types in Google Forms offer a setting called “response validation.” Use it to require a response to fit a certain criteria:

- Checkbox questions: set a minimum or maximum number of choices that can be selected.
- Short Answer question: use the Regular Expression feature to get consistently formatted phone numbers, zip codes, or state abbreviations.
- Paragraph Question: set a minimum or maximum response length
2. Make your form look pretty!
While Forms has added the ability to change the header image, background, and some limited font options, with a little effort you can really make your form look nice!
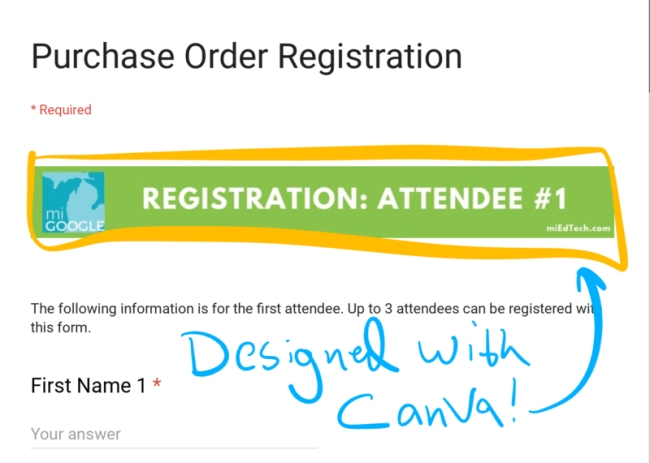
I frequently split my form into different sections and use the image element to add graphics.
A good example is this conference registration form: http://tinyurl.com/y48js49p

I use Canva to create most of my form graphics. I discovered that the “Leaderboard” template works really well with forms.
Another trick you can try is adding emoji to your form questions and answer choices. I use the fire and right-pointing-hand symbols to emphasize important information or numbers in highlighted blocks if I have a set of steps I want to clearly explain.
Tech & Learning Newsletter
Tools and ideas to transform education. Sign up below.
The Emoji One Chrome extension is what I use to access emoji icons on my Chromebook (works on Mac and PC too!).
3. Automate with Add-ons
Once you’ve mastered the essential elements of forms, you MUST dive into add-ons.
Add-ons are like apps for Google Drive. To become a true Form Fanatic you need to be familiar with add-ons for forms AND sheets.
Add-ons will help you work more efficiently and create automated systems. I use a LOT of different add-ons for different situations. Here are some of my favorites:
Form Add-Ons:
- Choice eliminator removes MC options from your form after they have been selected. Great for sign-ups, volunteer opportunities, and reservations.
- Form Limiter will set limits on how long your form is available or how many responses a form will receive before it is turned off. Great for forms with deadlines.
- Use Email Notification for Forms to send out email or mobile phone notifications when a new submission is received.
Sheet Add-ons
- Autocrat is one of my personal favorites! I use Autocrat to generate documents based on form data (certificates, invoices, meeting agendas, etc)
- Copy Down isn’t super exciting, but it’s very helpful! I use Copy Down to apply formulas to incoming form data to create automatic calculations.
- FormMule is an email merge utility that you can use to send customized emails based on form responses. I use FormMule when I need to run calculations on my form data before sending out an email.
There are a LOT more add-ons, but those are some of my favorites!
4. Filter, Sort, and Pivot your Data!
We use Google Forms to collect data. Once someone submits a form, the information gets dumped into Google Sheets...and things get interesting!
A spreadsheet is an amazing tool for collecting and organizing information. Here are three things that you should know how to do in Google Sheets:

- Sort - Sort a column in your spreadsheet to organize your data alphabetically or numerically. This is basic, but very useful!
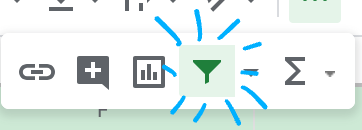
- Filter - Filter your sheet to isolate the information you want to see. For example, you might use the filter option to hide quiz scores for your first and third hour classes so that you can review the scores from second hour.
- Pivot - A pivot table lets you look at your data from a different perspective. This is especially helpful with things like test scores or survey information. For example, you might “pivot” your data to see if the 8th grade students who had failing grades in math also struggled in their ELA courses.
Data analysis is super important topic. If you want to learn more, I recommend that you connect with Ben Collins, the smartest Google Sheets guy I know!
5. Autograde and lock your quizzes!
Google Forms has a special quiz mode that will auto-grade student choices!
Stop wasting your precious time hand-grading paper quizzes! Auto grade them!
Don't limit your quiz to traditional multiple choice questions! Here are a few ideas you might want to try:
- Image Questions - insert and image of a map or equation and and then ask comprehension questions (great for math and science!)
- Video Questions - Add a short video to your quiz and then ask questions about the video content (great for world language!)
- Check Box Questions - Use the checkbox question and have students select “all that apply.”
- Matching Question - use the grid question type to set up a matching question.
Be creative... there are LOTS of possibilities.
You may have heard about the new LOCKED MODE for Google Forms.
I shared an early review a few months ago. When enabled, locked mode will prevent students from accessing other information during a quiz.
It's pretty awesome!

Locked mode is NOT available yet...but it should be very soon (March?)! Watch this video or read this blog post to see how it works!
Each spring I teach a 5 week Google Forms masterclass. Join me for a deep dive into Google Forms!
I offered this course for the first time in the spring of 2018 and the feedback was outstanding:
This course is perfect for classroom teachers, tech coaches, and school administrators!
Interested? Click here for details!
cross posted at electriceducator.blogspot.com
John Sowash creates useful resources for educators on his blog, The Electric Educator. John is the author of The Chromebook Classroom and founder of the Google Certification Academy. You can connect with John on Twitter (@jrsowash) and Instagram.
