How Do I Create A YouTube Channel?
If you want to create a YouTube channel for your class, this is everything you need to know
If you want to create a YouTube channel for your class, and beyond, there is quite a bit to think about. Despite these glossy videos seeming to be effortlessly made by those teachers who have become YouTube sensations, they have put in a lot of work behind the scenes.
Don't be intimidated. You can do it relatively easily too and still get a great end result. It's up to you how much time, effort, and money you want to invest in your channel. And with the potential to make money from it, you may find it grows naturally over time.
So what do you need to consider if you're going to create a YouTube channel of your very own?
- What Is Screencast-o-matic and How Does It Work?
- 6 Ways to Bomb-Proof Your Zoom Class
- Zoom for Education: 5 tips
- Why Zoom Fatigue Occurs and How Educators Can Overcome It
1. Open an account
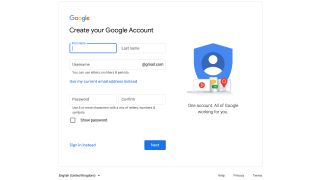
If you want to get in on the YouTube action then you'll need to sign-up for an account with the parent company, Google. You may already have a Google account making this as easy as signing in on the YouTube app or website. If not, head over to Google.com and sign up before logging into YouTube.
If you're creating a teaching account then you may want to use your real name, a moniker of some sort, or perhaps a title you've come up with that suits the type of teaching you're going to offer. A suitable photo, image, or logo to go with that can be useful to have available at sign-up too.
2. Setup a YouTube channel

At this point you will want to direct yourself to channel creation. The easiest way to do this, for your personal account, a class, or school, is to start uploading. If you go to upload a video then you will immediately be asked which channel it's going to. Since you don't have one yet, you'll be prompted to create a new channel.
Check over your account name and profile picture that will automatically populate the channel. If you're happy, continue through the process. This will then allow you to define how the channel is restricted for your students, if this is a school account. You can select the options to: like a video, comment on a video, favorite a video, and subscribe to the channel. For the best engagement it's advisable to check all these options as available. You can always moderate comments later if needed.
Tech & Learning Newsletter
Tools and ideas to transform education. Sign up below.
You are then able to decide if this channel will be public, private, or unlisted. Ideally you'll go with public so it can be found by students and potential followers. But if you go unlisted that lets you share the link with anyone that you want to find it, but it can't be found using search.
You are also able to set specific videos to unlisted – ideal if you have students in one and wish to keep their privacy.
3. Set production standards
It's important to develop a consistent and high-quality video style that you maintain. This not only makes the videos more enjoyable and engaging, but also gives you a defined style that helps you to be recognized more easily. On top of this, it provides a level of continuity for students so that they can feel comfortable when settling back into this video space for their next session.
A few basics are important when thinking about making your videos:
Use decent lighting
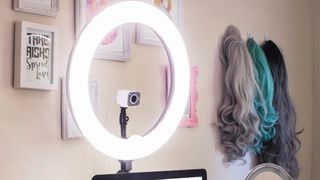
Lighting is one of the most important parts of any video. A well-lit video is clearer, more natural, and far more engaging than one with shadows and distracting darkness. This can be most easily achieved by placing the light behind the camera, thereby lighting the subject facing the camera while also allowing the lens to let in maximum light. If there's not a lot of natural light, think about using lamps, a ring light, and/or room lighting to add to the ambience.
Make sure you're heard
Audio is very important, especially if you're dictating instructions to students -- just like in class. Most smartphones have multiple microphones that do a good job or picking up voices specifically. But be sure to minimize background noise (close those windows) and speak loudly and clearly. If you're struggling, then investing in a dedicated clip-on or omnidirectional microphone could be a worthwhile idea to provide a more professional finish.
Edit your videos
There are lots of software options out there for editing video but YouTube itself features an editor in the app so using that can often do the trick without costing you anything extra. This lets you shoot video in chunks and put it together later, taking off the pressure to get it all right first time.
4. Post videos regularly
There is huge value in posting videos with regularity. This allows students, and fans, to know when they can expect more content to land so they look out for it. This gets consistent viewing and can help to grow the channel -- YouTube appreciates regularity as does Google when it comes to searching for videos.
Regularity also offers stability to students that may grow to enjoy this video learning time as a part of their routine.
5. Flip your classes
Using your videos to offer a flipped classroom can be very valuable on two fronts. Primarily it allows you to teach students outside of class time, with a lesson overview for example, so you can focus on questions, answers, and drills in the class itself. Secondarily, this also provides a useful pre-lesson resource for other teachers. This could be used in your school but may also be sought after by other teachers.
As you offer more useful resources regularly, you may find that you gain more subscribers and increase you video views. This is where you can start to grow your channel further.
6. Monetize your YouTube channel

Once you reach a certain subscriber threshold and break through then you can start making money from your videos, by which you're paid directly by YouTube. This means that the more views you get, the more money you can make.
This is where you can start to invest that money back into production. From buying a dedicated camera to filming lighting and audio gadgets, as well as props and software. All of these can enhance the professional finish of your videos and make your productions even more appealing to students and other viewers, letting you grow even more.
Luke Edwards is a freelance writer and editor with more than two decades of experience covering tech, science, and health. He writes for many publications covering health tech, software and apps, digital teaching tools, VPNs, TV, audio, smart home, antivirus, broadband, smartphones, cars and much more.
