How to Setup Google Classroom
Get started using Google Classroom to go from nothing to lesson planning right away
How to set up Google Classroom is a commonly asked question that you're about to have answered right here. You might have heard that Google Classroom is easy to use and may have felt looking up any advice reflected badly on you. Don't feel bad! As every teacher knows, knowledge is power, and you want every tool in your box at its fullest in your quest to educate.
Before we get going, check out our guide on the essentials of explaining What is Google Classroom?. Spoiler alert, it's an online space that allows teachers and students to share documents and communicate. But since you're here, you probably already know that. So let's move on.
Google Classroom is a lot of things but what it is not is a Learning Management System (LMS). So don't think you can ditch the likes of Blackboard just yet. However, Classroom does work alongside class-based learning to help make for a paperless assignments and resources future.
You might be a teacher looking to set up a class, a student interested in how the platform works, or a guardian looking to learn more. Whatever perspective you're coming from, this guide will help.
Google Classroom setup: Create a class
The first step you'll need to take is to create a Google account, if you don't already have one. If not then head over to Google and sign up for a free one. This will give you a Gmail address, access to Google Docs, Sheets, Slides, and plenty more. But, crucially, it'll give you access to Google Classroom.
When on the Google main search page, you'll see your account is signed in at the top right. Next to that is a menu that looks like nine square dots. Select this and you'll be shown all the online apps that Google offers. Scroll down to near the bottom and you'll see Google Classroom. Select this.
That's it, you're in. Now you can create a class, if you're a teacher, or join, if you're a student. This is where the guide will be more useful to teachers from here on as it's about setting up a class.
Tools and ideas to transform education. Sign up below.
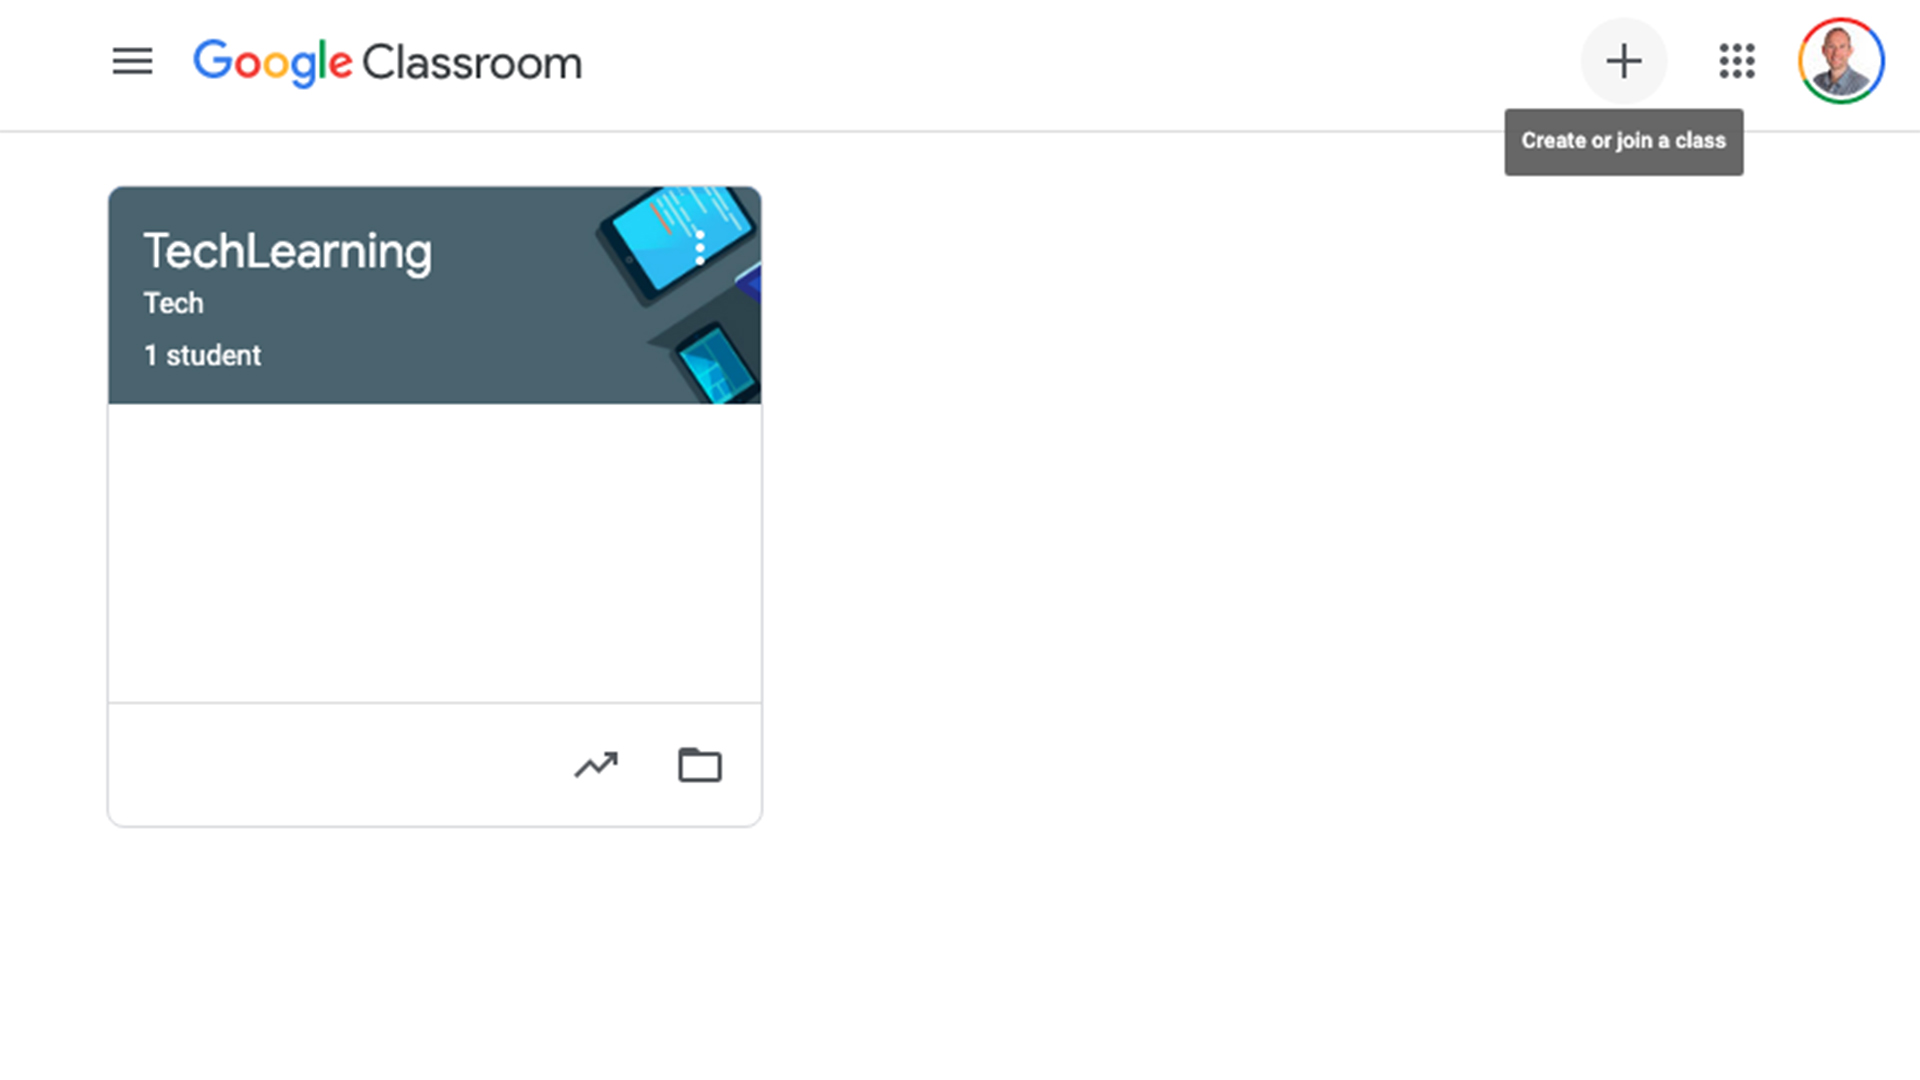
At the top right there will be a "+" icon. Select this then from the drop-down option pick "Create class."
How to create a class in Google Classroom
Once you've selected "Create class," you'll be met with a message from Google headed "Using classroom with a school/university with students?" This will allow you to link your class to a school or university network, for benefits such as class sharing and student contact easy access, presuming your institution has signed up for G Suite for Education. Agree and move on when you're set.
Next you can enter some basic class details, including the "Class name," "Subject," and "Room" number. You can also add a "Section" if you want to group classes, but it isn't required at this stage. In fact, only the class name is required initially. Then select "Create."
How to personalize a class in Google Classroom
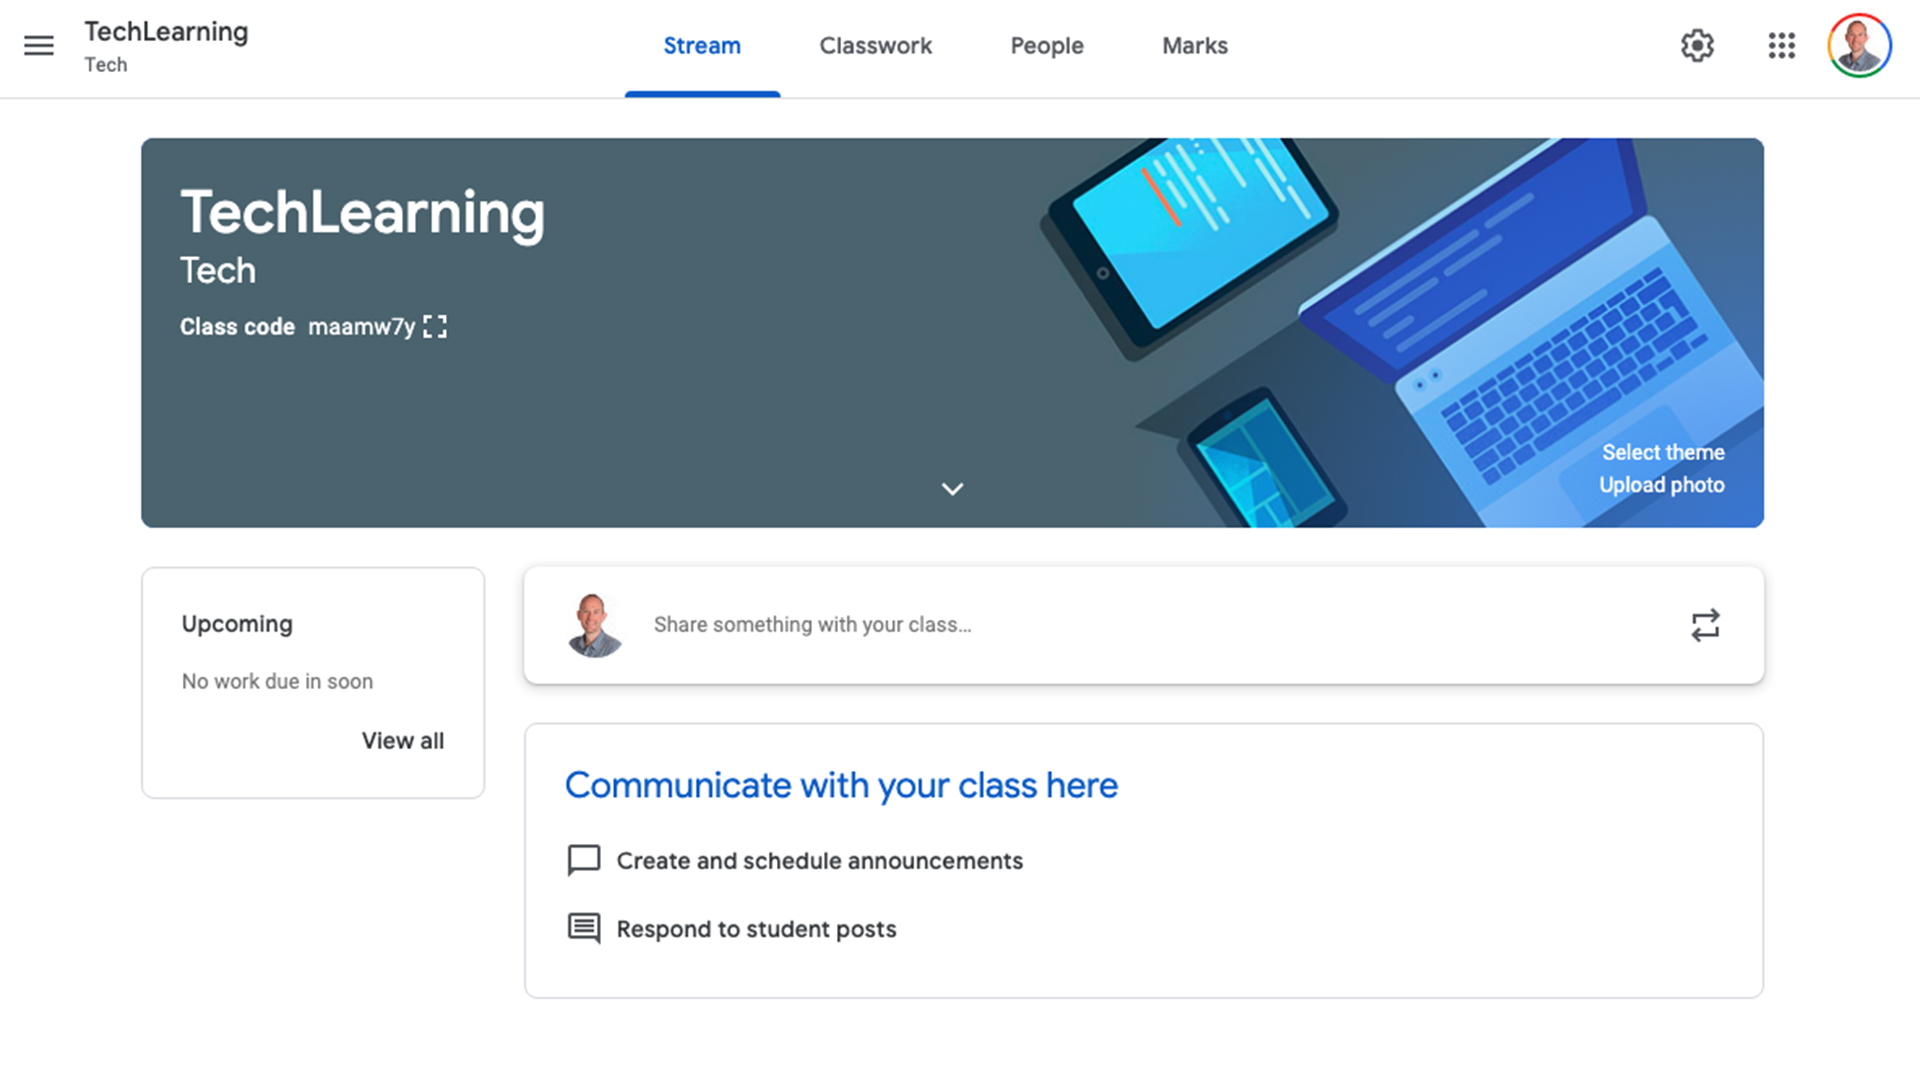
You should now be in your Google Classroom that looks like the above image. You'll notice the large banner image at the top. This can be changed to help personalize the class. This will also apply to the thumbnail class image for your students so they can quickly differentiate your class from the others on their landing page. The same applies to you if you have multiple classes.
Within that top banner image are options, at the bottom right, to "Select theme" or "Upload photo." Choosing the first option is the quickest and easiest, and will offer you various themes that are grouped by class type, including "General," "English & History," "Math & Science," "Arts," "Sports," and "Other." Pick one, hit "Select class theme" at the bottom, and it will automatically appear on your landing page.
The next step you may want to take will be to add work before you invite students to join, so they've got a working class ready for their arrival. This is done in the Classwork section.
How to use Classwork in Google Classroom
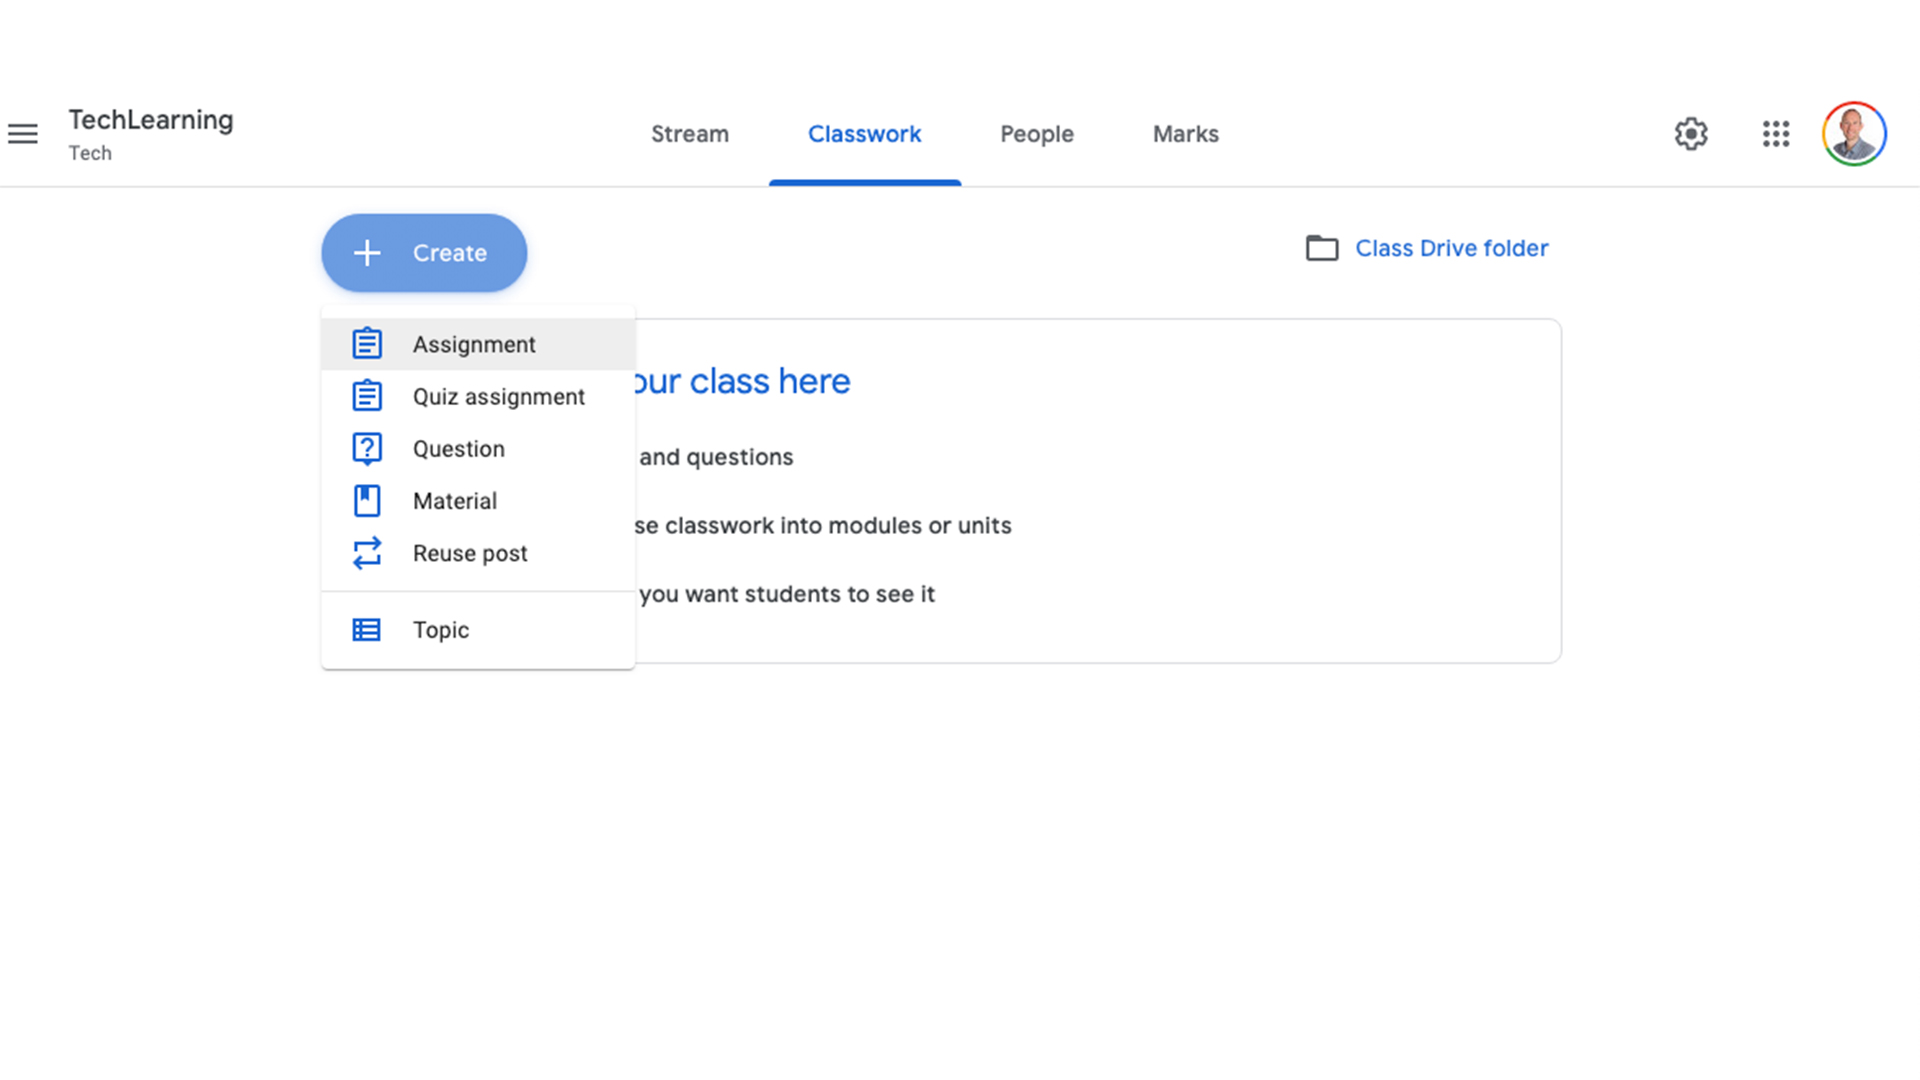
The Classwork section of Google Classroom is where assignments can be created and listed.
Select the "Create" icon and then pick what type of work you want to create with options, including assignments and quizzes. The difference is that a quiz can have multiple choice answers that the students complete within Google Classroom, whereas an assignment generally requires the student to fill out or create a separate attachment such as a Doc, Slide, or Sheet.
A quiz allows you to get quickly marked answers whereas an assignment will require marking and grading. That said, you can create self-marking Sheets in which multiple choice answers are offered. (More on tips like that at the final link in this article.)
This work will appear on the Stream that all students can see. You can also set work specifically to certain students, but to do that you need to make sure you have enrolled students by using the People section.
How to use People in Google Classroom
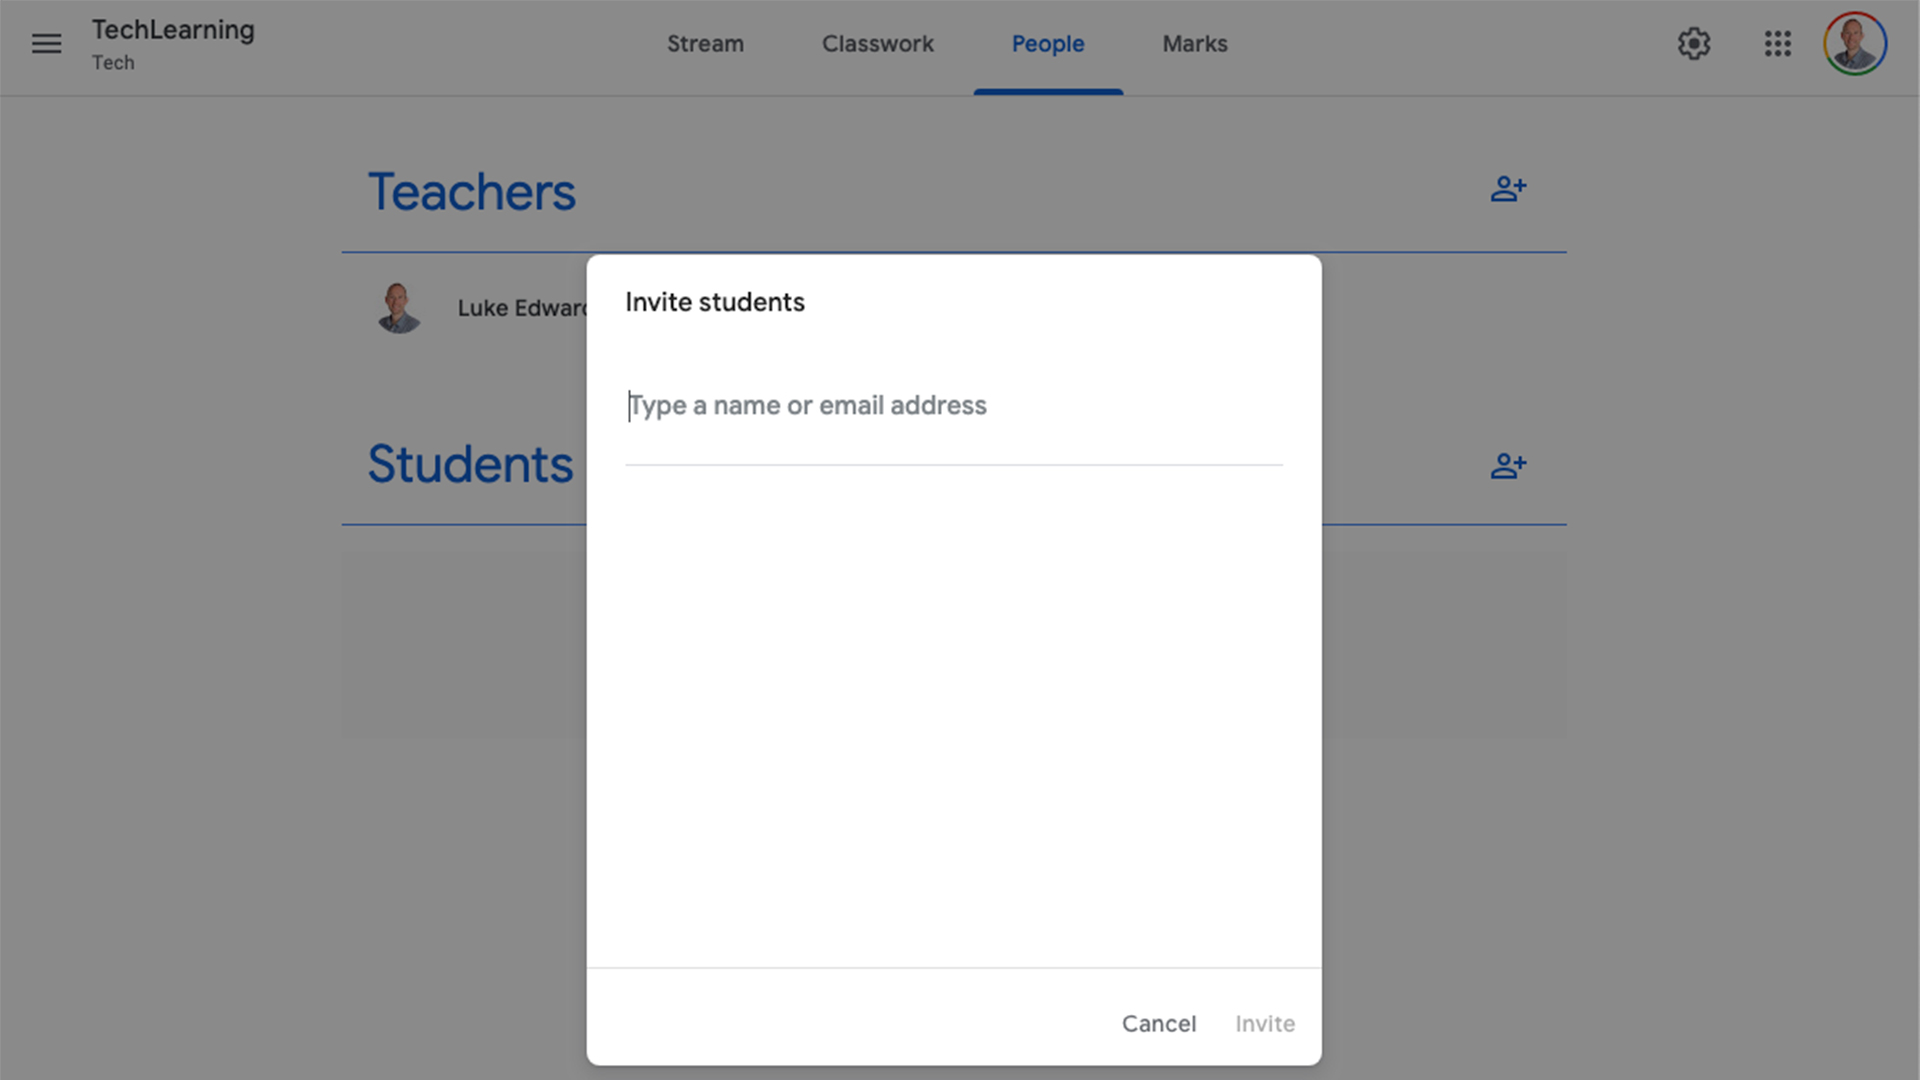
The People tab in Google Classroom is where teachers can add students to the class via their email addresses. This functionality allows you to compile a list of class attendees and share the class entry code. By doing it this way, students will all be emailed the link and code, making it very easy to join. You can add students with a bulk email list or one at a time.
If you've got an account linked to a school or university with G Suite for Education, you may find that this can be more easily populated as the email addresses of students will already be intelligently entered. Presuming those details are available.
Using Google Classroom
You're now all set with assignments lined up and students invited. The next step is to add more detail, update the Stream with announcements and interactive content. But there's much more to do.
Check out some great tips on using Google Classroom in Google Classroom for Teachers: A How To Guide.
Luke Edwards is a freelance writer and editor with more than two decades of experience covering tech, science, and health. He writes for many publications covering health tech, software and apps, digital teaching tools, VPNs, TV, audio, smart home, antivirus, broadband, smartphones, cars and much more.
